– A Complete Lansulaser Guide for Industrial Buyers
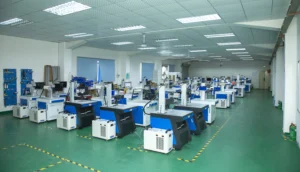
Ultraviolet laser technology has become an essential tool for manufacturers that need to place crisp, permanent, and contamination-free marks on heat-sensitive or highly refined parts. Because the 355 nm wavelength performs “cold processing,” it avoids the melting, carbonization, and surface stress that infrared systems can create. The result is a code or graphic that meets traceability and brand-identity standards without damaging the substrate. This in-depth article—written for B2B engineers, production managers, and automation teams—explains exactly how to run a UV laser marking machine, how to navigate EZCAD step by step, and which process parameters to start with on ten of the most common industrial materials. All examples reference Lansulaser equipment, produced at our 5 000 m² facility in Dongguan, China, where more than one hundred patents and a full ISO-certified quality system back every shipment.
1. Why Choose UV Laser Marking?
Traditional CO₂ and fiber lasers deliver outstanding speed on many substrates, yet they struggle with plastics that discolor under heat, multilayer films that delaminate, or glass that cracks when subjected to thermal shock. A UV photon carries roughly three times the energy of an infrared photon, so it can break molecular bonds directly through a photochemical reaction. Because little heat flows into the bulk material, the heat-affected zone (HAZ) shrinks to a few microns. That “cold” interaction delivers four benefits every industrial buyer should recognize:
- Extremely fine line width—30 µm or smaller, enabling Data Matrix codes under 1 mm².
- High contrast on light plastics without carbonization; no yellow halo or burn marks.
- Minimal surface stress, which means fewer micro-cracks in tempered glass or brittle ceramics.
- Cleanroom compatibility, since the process generates almost no spatter or airborne particles.
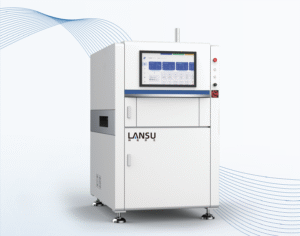
Lansulaser offers 3 W, 5 W, 10 W, and 15 W ultraviolet modules, each built on a granite-stable frame with active water cooling, electronic interlocks, and a triple-stage fume-extraction interface that satisfies ISO Class 5 requirements in semiconductor and medical-device environments.
2. Principle of Operation in Plain English
A diode-pumped solid-state resonator first produces a 1 064 nm beam. Non-linear crystals inside the laser head frequency-triple that energy to 355 nm. The ultraviolet beam travels through a sealed fiber or free-space path to a galvanometric scan head, where two mirrors deflect it across an F-theta lens. The lens focuses the beam into a 15–30 µm spot (depending on focal length). When the photon stream hits the substrate, it disrupts molecular bonds faster than heat can spread, removing or restructuring a micro-layer of material. On plastics the beam can turn pigment molecules colorless or induce localized foaming for a bright, raised effect. On glass it forms a smooth mark without the micro-cracks associated with sand-blasting or mechanical scribing.
3. Unique Advantages of a Lansulaser UV System
- Power flexibility – 3 W for ultra-fine semiconductor labeling, 5 W for medical disposables, 10 W for smartphone covers, and 15 W for high-throughput packaging lines.
- Vision alignment built in – A high-definition CCD camera locates fiducials and adjusts the mark with ±0.01 mm repeatability, eliminating costly mechanical guides.
- Automation-ready architecture – RS-232, TCP/IP, OPC UA, EtherNet/IP, and clean 24 V I/O let you embed the laser into any PLC or MES you already run.
- Patented thermal management – An active condensate-control circuit prevents fogging in humid climates, keeping optics spotless inside ISO Class 5 cleanrooms.
- Rapid global support – Remote troubleshooting within forty-eight hours and on-site service from certified technicians in major manufacturing regions.
4. Preparation Before You Press “Mark”
- Safety eyewear: Always wear OD 6+ goggles rated for 355 nm light. Even diffuse reflections at this wavelength can be hazardous.
- Enclosure integrity: Make sure safety doors and interlocks are closed. Lansulaser machines will not emit a beam unless all circuits confirm a sealed work zone.
- Fume extraction: Start the extractor at least one minute before the laser to guarantee steady airflow through pre-filter, HEPA, and activated-carbon stages.
- Cooling water: Maintain the chiller at 18 °C to 22 °C with conductivity below 30 µS/cm. Variations can shift beam focus or reduce crystal life.
- Precision fixturing: Use aluminum or PEEK nests with ±0.02 mm positional repeatability. Fiducial markers etched into the jig help the CCD align each part.
- Surface cleaning: Wipe the target area with high-purity isopropyl alcohol; fingerprints degrade beam absorption and contaminate the protective window.
5. Ten-Step EZCAD Workflow
- Launch EZCAD and define the workspace. Click New, choose the lens field size—100 × 100 mm is typical—and set the origin to the fixture’s datum.
- Import or create graphics. Bring in DXF, AI, PLT, or SVG files for vector artwork. For rasters, use BMP, PNG, or JPG at 400 dpi or higher. The Text tool generates serial numbers, date codes, barcodes, and QR codes inside EZCAD without external software.
- Assign layer parameters. Select a layer and set Power %, Speed mm/s, Frequency kHz, and Hatch mm. If your job contains both a logo and a serial number, place them in separate layers so you can optimize each independently.
- Preview with red light. Press the Red button or hit F1 to project a harmless visible outline onto the part. Check position, rotation, and scale.
- Focus the beam. Turn the Z-axis hand-wheel or jog the motorized column. Each Lansulaser head ships with dual red pointers; merge them into a single dot, then fine-tune until the spot on the workpiece is smallest and brightest.
- Run a first-article mark. Close the enclosure and press F2. Listen for sputtering; on UV systems that usually means the speed is too low and material is vaporizing unevenly. A whisper-quiet mark with no debris is the goal.
- Optimize the recipe. Raise power by 3 %–5 % or slow the speed by 100 mm/s if contrast is weak. If you see yellowing or foaming on polymers, reduce power and increase frequency. Store every successful combination for later use.
- Save the recipe file. Click Save Para, name the file after your SKU, and place it on a shared drive. Operators can load it with one click during future runs.
- Enable Dynamic Serialization. Open Dynamic Text, choose Auto-Increment for sequential numbers or Database for ERP-driven codes. Set Laser-On and Laser-Off delays to prevent broken strokes at high speeds.
- Validate production. Mark five consecutive pieces, measure barcode quality (ANSI/ISO), and log contrast ratio or optical-density values. Once the batch meets spec, release it to full production.
6. Starting Parameters for Ten Common Substrates
(5 W UV source, F-theta 100 mm lens)
| Material | Power % | Speed mm/s | Frequency kHz | Hatch mm |
|---|---|---|---|---|
| ABS plastic | 40 | 300 | 30 | 0.04 |
| Polycarbonate | 35 | 400 | 35 | 0.05 |
| PET film | 25 | 600 | 40 | 0.05 |
| HDPE cable jacket | 30 | 500 | 35 | 0.05 |
| Soda-lime glass | 18 | 200 | 20 | 0.03 |
| Sapphire wafer | 22 | 150 | 25 | 0.03 |
| Alumina ceramic | 28 | 250 | 25 | 0.04 |
| Color-anodized aluminum | 32 | 350 | 30 | 0.05 |
| Coated paperboard | 20 | 700 | 40 | 0.06 |
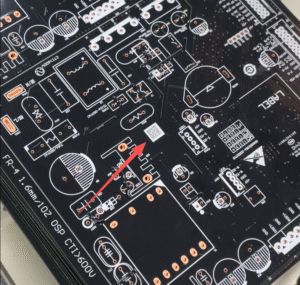
| PCB solder mask | 26 | 300 | 35 | 0.04 |
Tuning tips
- Yellow halo on plastics – Lower power by 3 % and raise speed.
- Micro-cracks in glass – Increase frequency by 5 kHz and decrease hatch spacing.
- Deep recessed logos – Enable Loop for 3–5 passes and cut speed 20 % per pass.
- Very small QR codes – Use a 63 mm lens for a 10 µm spot and reduce hatch to 0.02 mm.
7. Preventive Maintenance in Three Easy Intervals
Weekly – Clean the protective window with 99 % IPA and a lint-free wipe. Empty the pre-filter bin on the extractor.
Monthly – Inspect fiber connectors and cooling-water hoses for leaks or dust. Back up all EZCAD recipes to a secure server.
Quarterly – Replace activated-carbon and HEPA cartridges. Use the Lansulaser dot-grid calibration plate to confirm the scan head’s X/Y linearity and angular accuracy.
Because UV lasers use sealed frequency-converted modules, you never have to realign internal optics or replace flashlamps, eliminating two major cost drivers in older YAG systems.
8. Integration and Automation
The Lansulaser control board supports RS-232, TCP/IP, MODBUS RTU/TCP, OPC UA, and EtherNet/IP, plus sixteen isolated 24 V inputs and outputs. Our SDKs for C#, Python, and LabVIEW allow you to:
- Pull order data from your ERP and push finished-goods serial numbers back in real time.
- Trigger a six-axis robot to load and unload parts based on laser completion signals.
- Drive a conveyor indexing system, pausing each pallet under the scan head precisely.
- Link the vision camera to SPC software that checks code contrast and rejects non-conforming parts.
Customers who enable even a basic conveyor handshake report scrap rates under 0.2 % and labor savings that pay back the machine in eight to twelve months.
9. Frequently Asked Questions
EZCAD does not list our corporate font. Copy the .ttf file into C:\Windows\Fonts, restart EZCAD, and the font will appear.
We change jigs every shift and lose alignment. Engrave a fiducial cross on every fixture corner or use the built-in CCD to detect two reference holes; the software will auto-offset X and Y so the part is always centered.
Can the UV laser mark curved glass tubes? Yes. Add our precision rotary axis; the galvanometer synchronizes with rotation so the mark wraps perfectly.
Does a higher-power laser always increase throughput? Only when the material can absorb extra energy efficiently. Transparent PET, for example, may plateau beyond 7–8 W. In that case, raising frequency or optimizing hatch often yields better speed gains.
10. Business Case and Return on Investment
A smartphone-lens manufacturer once used hot stamping to print alignment marks. Cycle time per lens was three seconds, rejects were at 2 %, and each aluminum stamp wore out after 25 000 impressions. By switching to a 10 W Lansulaser UV unit, the factory cut cycle time to 0.4 s, scrap to 0.1 %, and consumable cost to zero. The system paid for itself in seven months. Similar results appear in medical catheter lines, automotive switch overlays, and high-volume PCB shops, especially where cleanroom certification and microscopic codes are mandatory.
11. Ready to Mark the Future? Contact Lansulaser Today
WhatsApp: +86 18925707676
Wechat: lansulaser668
Email: info@lansulaser.com
Address: No. 3 Baoyuan Road, Lianhu Village, Tangxia Town, Dongguan, Guangdong, China (Lansulaser)
Whether you need a compact desktop unit for R&D or a fully automated, vision-guided production cell, Lansulaser delivers precision marking and smarter manufacturing—on time, on budget, and backed by experts who speak the language of global industry.


